
My Garden Design Plans & All the Versions
This process has been … a process. We’ve tweaked the same space about seven times, though it’s felt like seventeen thousand. Here’s where we’re landing … still not a final map, but close!
The shape of our space is triangular which is hard, and I want it to feel more symmetrical than that. So, having rectangular beds is a bit Tetris-esque. We also don’t want the lines too clean, because then it’s going to look like a boring grid.
So, we’ve played with a layout quite a bit!
Additionally, once we hired a contractor, that made a lot of the seemingly solid plans change due to what’s really viable in the grand scheme. We have a bigger addition happening, so my garden needs to flow with that and be cohesive, though that project is delayed quite a bit. Oh the drama of renovating!
So, here is a peek into the iterations of our design. I have hand-drawn it and then we went to 2d to really play with angles a touch.
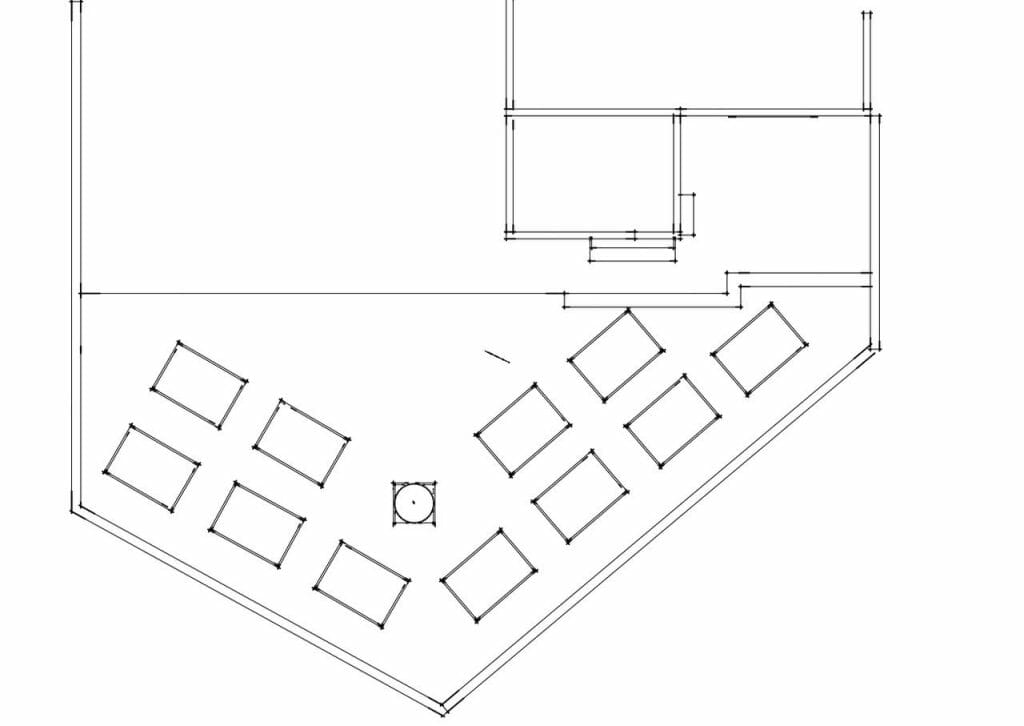
Round One: Smaller Beds
This drawing was done by a friend, and with smaller raised beds. Pictured here are 6’x3′ beds, but also just a layout that doesn’t work with the grading of our yard. We’re on a slope, so have to account for that, and the way that the land slips.
All the pathways here are too wide as well, though they look proportionate on paper.
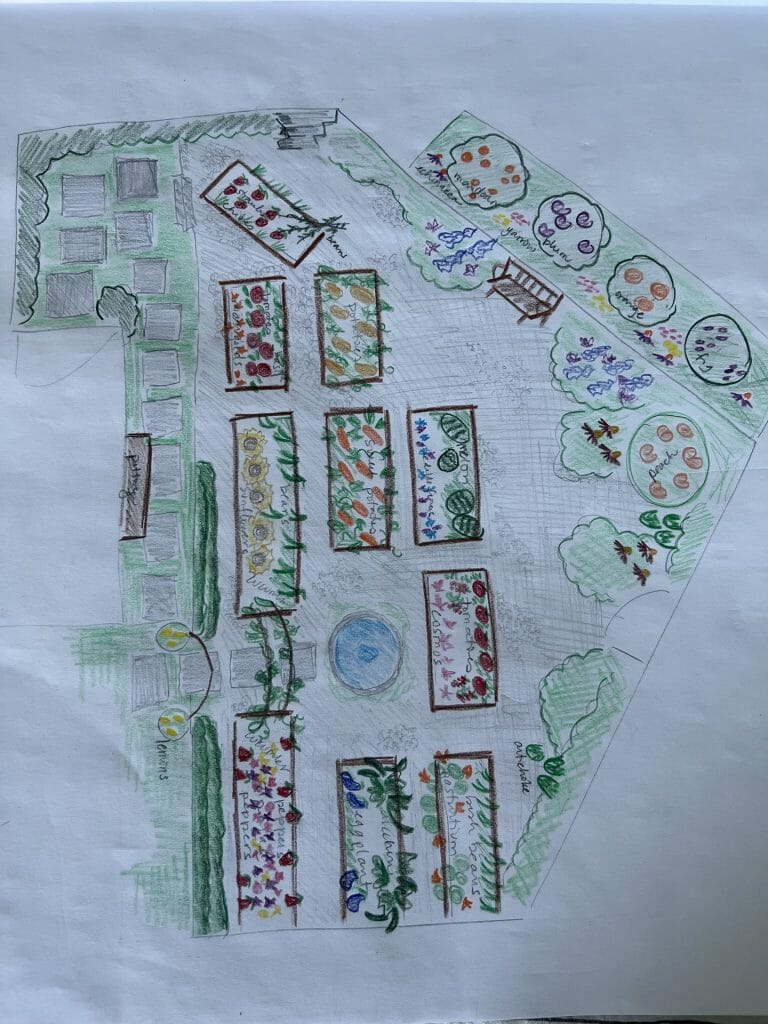
Round Two: Not To Scale
I started here, playing off that first design so that Joe and I could visualize the final look (without doing a 3D rendering). It’s hard for non-gardeners like my hubs to get what a border will look like, but this helped.
I then took the design to graph paper to really get measurements correct and create a spacing plan.
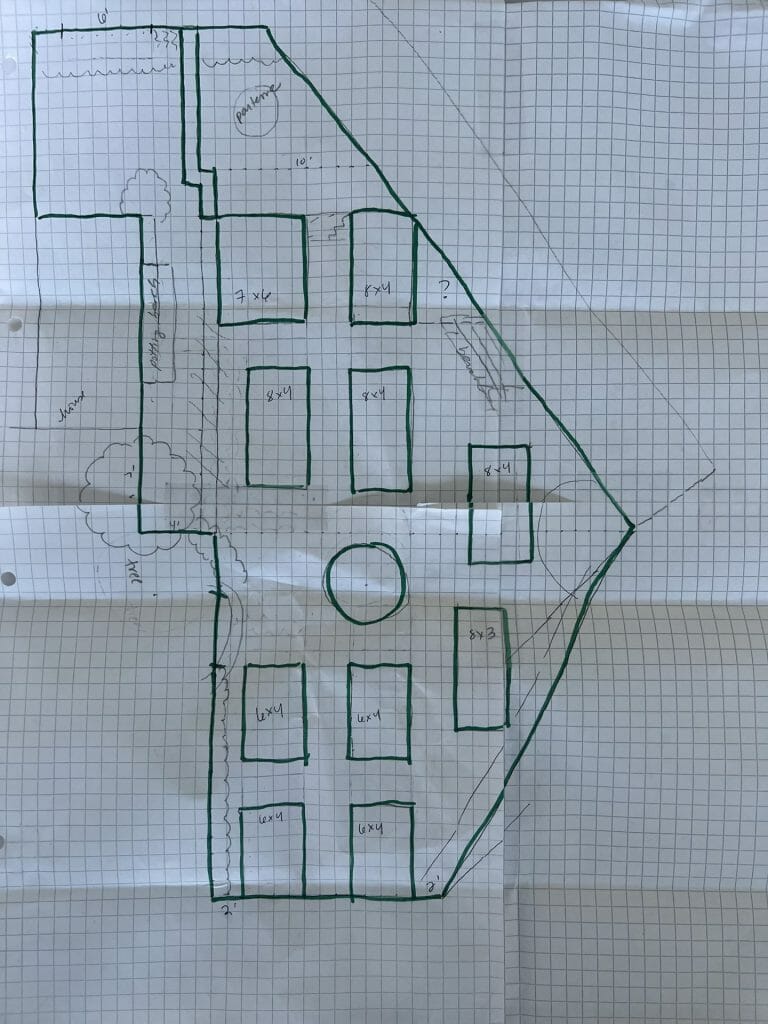
Round Three: Each Square is a Square Foot
This drawing is to scale, and you can see how I taped graph paper together to quickly get my vision out. I love drawing things by hand – it just suits me. Analog, baby!
What is hard to see with a drawing like this is perspective and a sense of space. You just can’t get a feel for pathway widths and if the boxes will look too large. You can see here that by now, I had made the beds larger to fit my large frame. These are 4’x8′ beds, so that adjusted things a touch.
In the top left of the sketch is some open space, which we are going to make either a parterre or a sitting area. This is the steepest part of the topography, so I added two beds to hold that earth up, potentially inserting a step or two.
We actually thought this would need to be two levels at this stage.
We learned after laying this out that the pathway to the fountain is too wide, and that we can really get more beds in here. Although, I don’t want too many beds, because then it feels cramped.
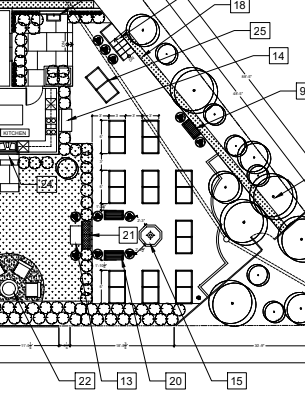
Round Four: One More Look At A New Angle
After seeing the space a bit and removing dirt, yy contractor drew this up. I immediately felt ill at ease. I am not an angles person. If you put a desk or a bed in the corner of a room, I physically feel spooked. So this was a no go for me.
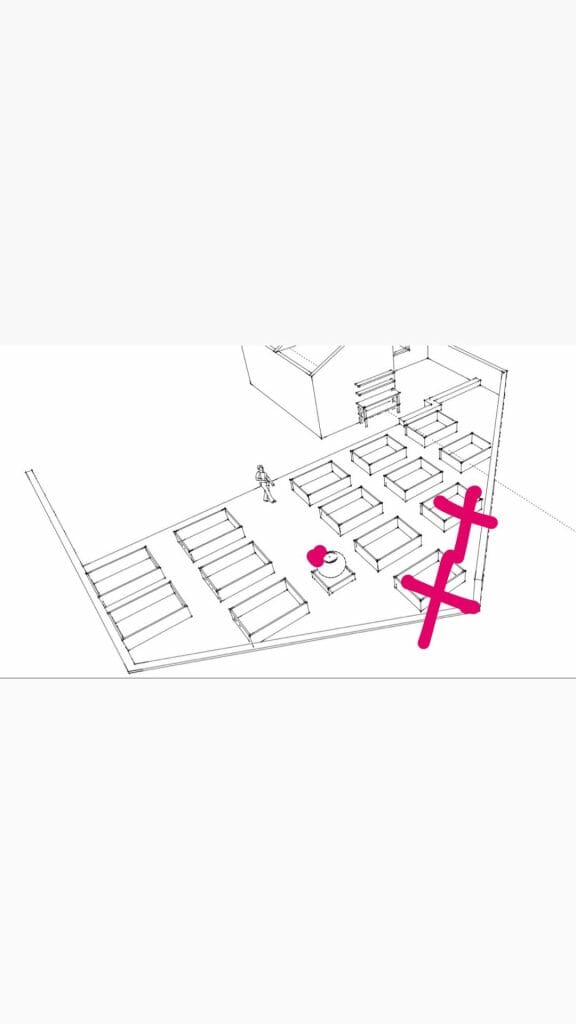
Round Five: Close to Final
As we approach the final phase, you can see that the more original layout is intact but we now have 14 (!) beds in the space – yowza! I took out two so that I can have my borders, leaving us with 12 raised beds that are 4’x8′.
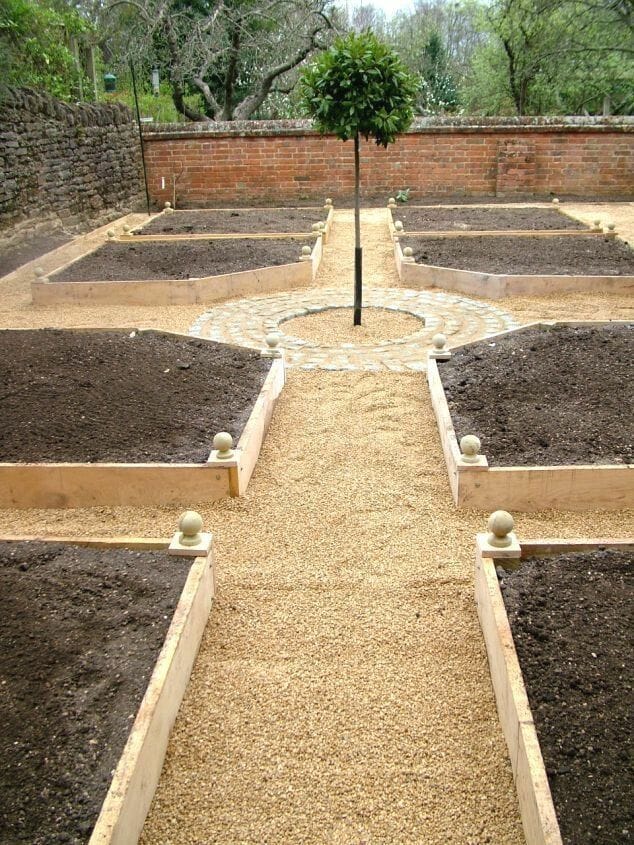
After looking at this as well, we’ll move the fountain up just a bit, and have the four beds that surround the fountain be clipped, meaning one edge will be cut at an angle to make the space around the fountain feel circular and more spacious (as pictured in the inspo image above).
What we found out as we walked the space and put down plywood to represent the beds, was that we don’t need three feet wide pathways around every bed. We can squish things in a bit, leaving one access point for a wheel barrel to get to each bed, as opposed to four access points.
From here, we can order our raised beds (more to come on that!), my potting bench, and start to dig trenches for irrigation. More to come on all of those details!
To see the “Before” post I have, go here. And for some raised bed inspiration, go here.