
How to Start Seeds Indoors
If you want to start seeds indoors, you will need a few supplies and a tiny bit of know-how. Depending on your weather (gardening always depends on this), you may be able to get away with minimal support, but we’ll see below.
First and foremost for your indoor seed starting, is determining what you want to grow from seed that transplants well. Some plants don’t transplant well, as their roots don’t like to be disturbed. For those plants, we always recommend starting them via direct-sowing in the garden.
A great rule of thumb is to always direct sow root vegetables, though a few other veggies are finicky too. As for flowers, you just need to read your seed packets and learn from trial, error, and flower farmers.
Vegetables to direct sow
- Peas
- Corn
- Beets
- Turnip
- Radish
- Carrots
- Cucumber
- Spinach
- Celery
Flowers to direct sow
- Sunflowers
- Cornflower
- Sweet pea
- Cosmos
- Zinnias
- Larkspur
- Alyssum
- Coneflowers
- Sage
- Nasturtium
- Aster
Now that those are out of the way, a majority of your vegetable and flower seeds can be started indoors, OR in special deep-rooted starter pots. I’ve seen some HERE, but still recommend direct sowing.
Step One: Getting Your Timing Right
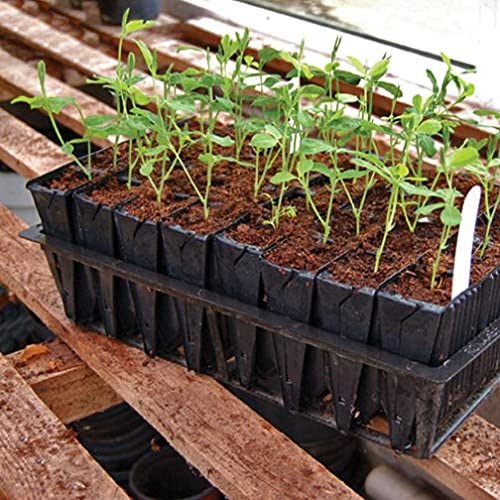
To get started with your indoor seed growing, you’ll need to know when each vegetable should be sown based on your last frost date. Next, work backward for about 10 weeks. The seeds take about 6-8 weeks typically to germinate and then get large enough to transplant. You’ll then want to “harden off” your plants, taking them outdoors for about a week. Hardening off means taking your plants outside little by little. You start with about 2 hours a day, then double the next day, and so on until it’s been about a week and you can try an overnight (if it’s not freezing).
This timing and process give you nice and strong transplants that can go in the ground. Keep in mind that you want a nice steady temperature of about 50 degrees Fahrenheit consistently. Nighttime temps are a true indicator of Spring’s arrival.
Some plants need longer to germinate and get large enough to plant outdoors, so get to know your plants and read those seed packets/catalogs thoroughly.
Step Two: Your Growing Approach
Depending on how you want to start your vegetables, will determine your soil mix and supplies – slightly. You can either start your seeds in disposable trays, reusable trays, via soil blocking, or in self-watering seed trays.
One way to approach soil is to purchase seed starting mix, which is premade for you. HERE is some on Amazon.
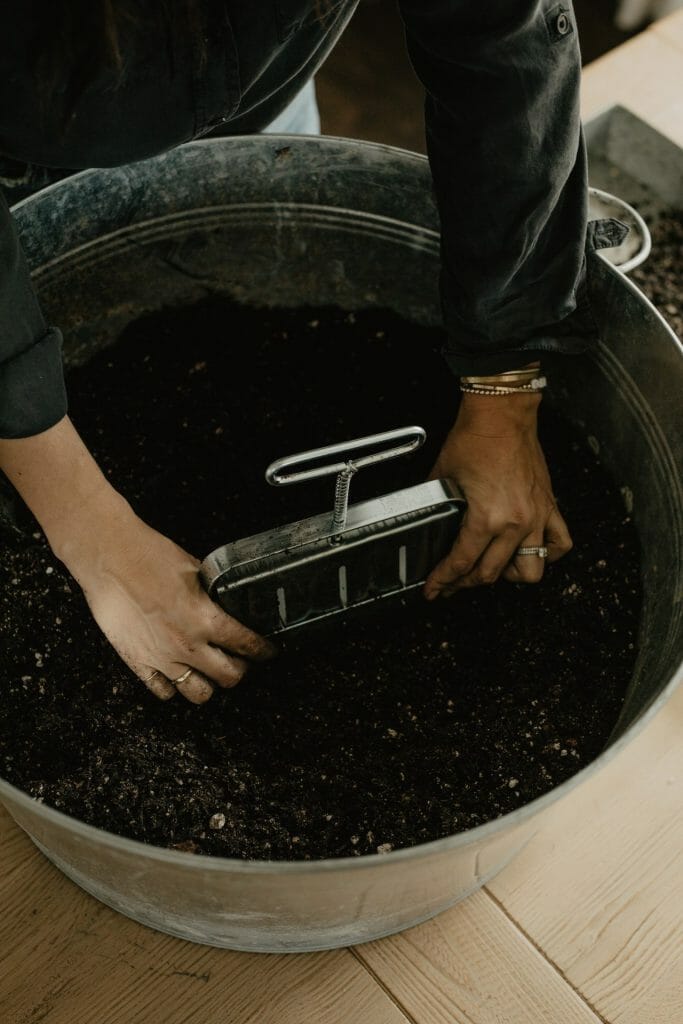
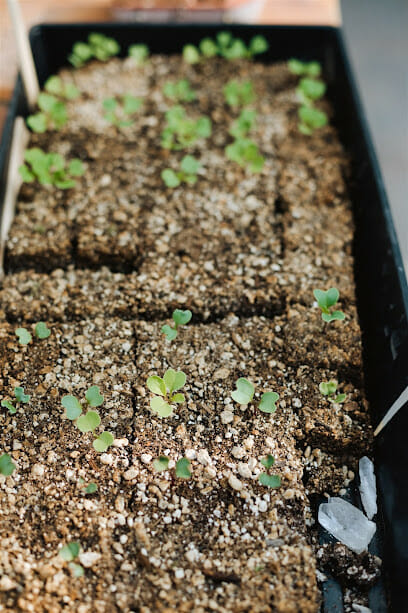
If you want to mix your own soil, below is a recipe. I recommend you mix your own soil if you are soil blocking, as it takes a very hearty mixture to stick together. Soil blocking is the most sustainable approach and requires a soil blocker tool. It makes perfect little soil squares that you can place in a tray, with dents on the top of the soil block for your seed. Once you get the hang of this approach, it’s fast, fun, and economical. I have a video HERE where I show how to do it.
You can get a soil blocker HERE.
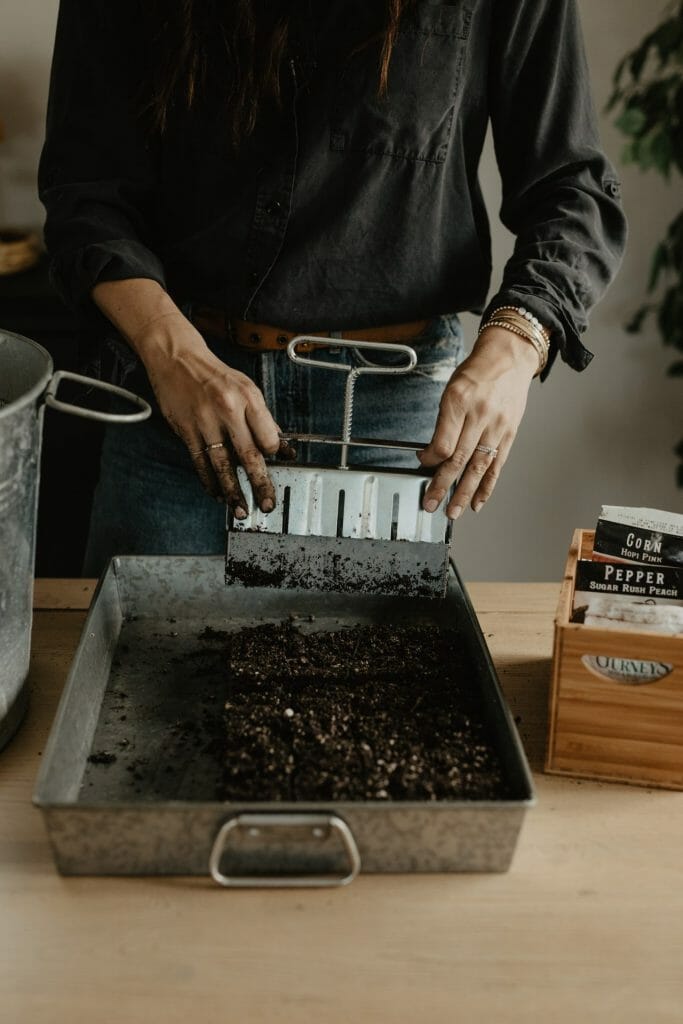
Seed Starter Soil Mix:
I used a 5-gallon bucket for my proportions, so that would be 3 buckets coconut coir, 1 bucket garden soil, and so on…
- 3 parts coconut coir
- 1 part garden soil
- 2 parts perlite
- 2 parts compost
- 1 cup bone meal
- 1 cup blood meal
Step Three: Supplies
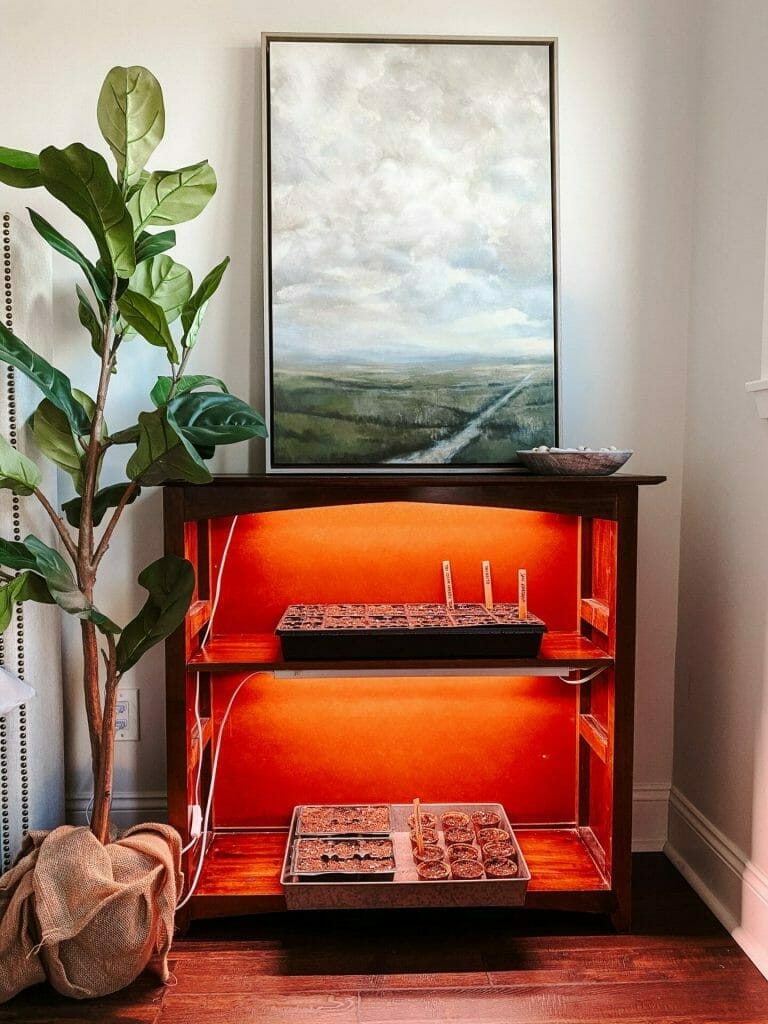
Now that you know your approach, let’s get some supplies. You’ll of course need your trays and soil and seeds, but you may also want to get grow lights and a heat mat. Some seeds need heat to germinate well, like tomatoes. However, some don’t. Or, you may keep your house warm enough for the process to work. I’ve had success without heat mats because I had my seeds inside, though if you are starting seeds in your garage or a covered outdoor space, you’ll probably need mats. Heat mats HERE. Also, once your seeds have germinated be sure to remove the heat pad, as too much heat can cause legginess as well.
Grow lights are necessary if you’re unable to place your plants in a sunny window. If you have a window that faces south, getting about 6+ hours of sun, then you could be fine. Otherwise, I recommend using grow lights. You’ll want your grow lights to be adjustable somehow because they need to be about 6-12 inches above your plants. Plants grown too far from the light can get leggy, meaning they have long stems, and typically don’t survive transplanting.
As your plants grow, you adjust your lights so that the plants don’t get burned on the lights.
Grow lights HERE.
Step Four: Plant
It is now time to plant your seeds! You’ll want to plant according to the recommended depth, and you can decide if you want to place more than one seed at a time – I usually do and then thin later. Some seeds that are hard to germinate like to be soaked as well. I soak some flower seeds, and my pea seeds typically. You’ll want to water as often as needed to keep the soil moist. Most seeds need continual moisture to germinate, but beware not to drench the soil. Just even dampness.
Good luck with your indoor seed starting adventure, and check out some other blogs I have below:
Read THIS article about why I choose heirloom seeds
Check out THIS article about making a DIY indoor seed station
Watch THIS video about soil blocking